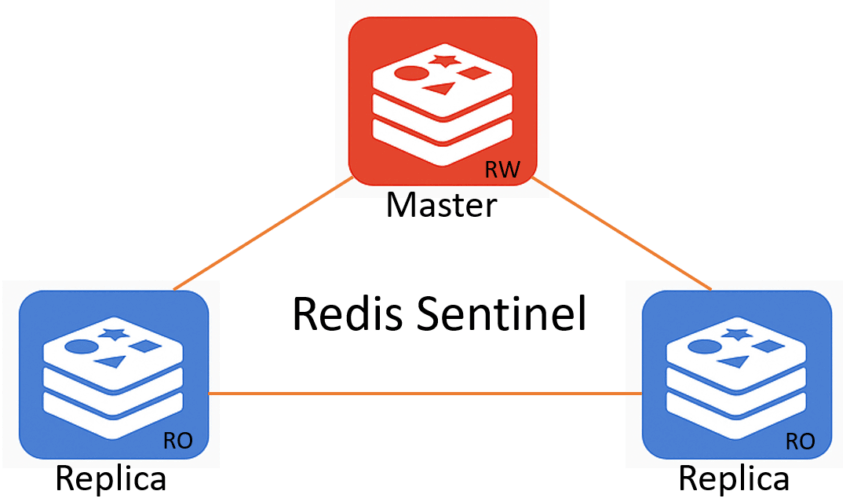
Redis is an open-source, in-memory data structure store, widely used as a database, cache, and message broker. Known for its lightning-fast performance, Redis operates by keeping data in memory rather than on disk, which allows for incredibly quick read and write operations. It supports a variety of data structures such as strings, hashes, lists, sets, and sorted sets.
One of Redis’s key advantages is its support for in-memory data storage with optional durability. This means that while Redis prioritizes speed by default, it also offers mechanisms to persist data to disk in case of a crash or restart. Redis provides two primary persistence options: RDB (Redis Database Snapshotting) and AOF (Append Only File).
RDB creates point-in-time snapshots of your dataset at specified intervals. It is efficient in terms of I/O and allows fast restarts, making it suitable for backup and disaster recovery. On the other hand, AOF logs every write operation received by the server, ensuring higher durability. You can configure AOF to sync to disk every second, on every command, or let the OS manage it. This flexibility allows to balance between performance and reliability.
In many production environments, both RDB and AOF are enabled simultaneously to leverage the strengths of both methods. When both are enabled, Redis creates regular snapshots and logs every operation. This hybrid model increases data safety but also demands careful tuning of parameters to prevent excessive disk I/O.
Another powerful feature of Redis is its support for high availability and automatic failover through Redis Sentinel. Sentinel continuously monitors your Redis deployment to detect failures and automatically promotes a replica to master in case the primary server becomes unreachable. It also updates the configurations of other Sentinel instances and clients to reflect the new master, ensuring minimal downtime. Sentinel helps Redis maintain strong consistency and availability in distributed environments, making it an essential component in production-grade Redis clusters.
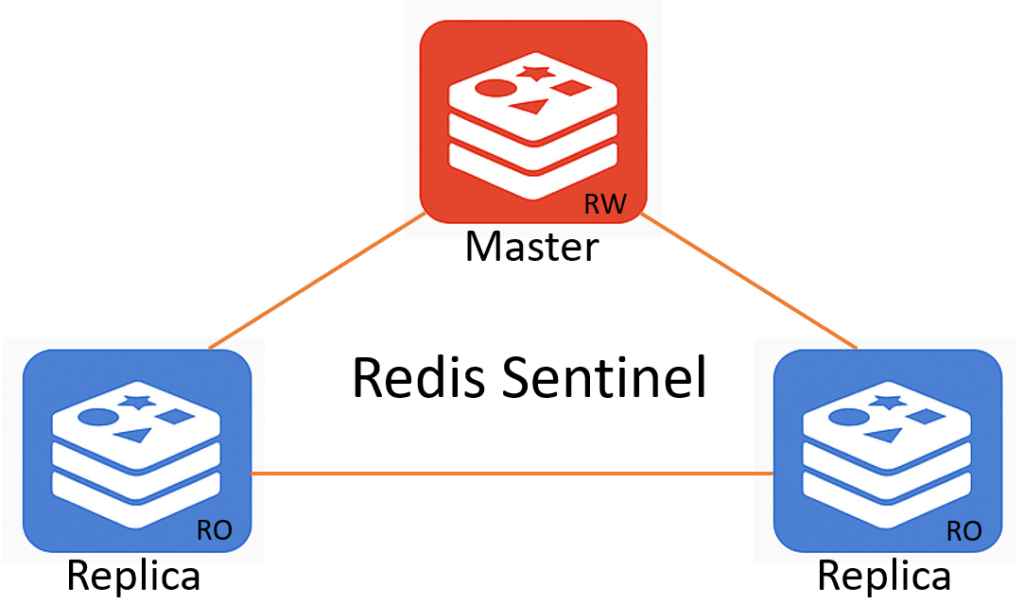
In this article, I will mention how to set up Redis, Redis Sentinel and Keepalived services consisting of 1 master and 2 replica nodes in detail. I will use Redis 7.2.x version.
Redis Servers Information
Hostname and IP
Master Node : rds1 – 192.168.1.12
Replica Node 1 : rds2 – 192.168.1.13
Replica Node 2 : rds3 – 192.168.1.14
Virtual Service IP – 192.168.1.11
First Step : Configure Operating System on Each Node
1. Upgrade Packages
yum upgrade
2. Selinux Disable or Permissive
You can do disabled or permissive
vi /etc/selinux/config
SELINUX=permissive
setenforce permissive
3. Firewall Close and Disable
You can open after installation,but you have to give permission to necessary ports and services for Redis
systemctl stop firewalld.service
systemctl disable firewalld.service
4. Chrony NTP Configuration
You can write your ntp server information in /etc/chrony.conf file to time sync.
vi /etc/chrony.conf
server yourntpaddress iburst
systemctl restart chronyd.service
systemctl enable chronyd.service
5. sysctl.conf Configuration
You can add below parameters to sysctl.conf for Redis performance as your needs.
vi /etc/sysctl.conf
# Redis Official
vm.overcommit_memory = 1 # Allows memory overcommitment, helps Redis avoid fork failures# Redis Community Recommended
vm.swappiness = 1 # Controls how aggressively the kernel uses swap
net.core.somaxconn = 65535 # Max connections queued before being refused
net.ipv4.tcp_tw_reuse = 1 # Allows reuse of TIME-WAIT sockets for new connections
net.ipv4.tcp_max_syn_backlog = 4096 # Max pending TCP connections in SYN state
fs.file-max = 100000 # Max number of open files allowed by the system
6. limits.conf Configuration
You can add below parameters to limits.conf for Redis performance as your needs.
vi /etc/security/limits.conf
# Redis Recommended Limits
redis soft nofile 100000
redis hard nofile 100000
redis soft nproc 65535
redis hard nproc 65535
redis soft memlock unlimited
redis hard memlock unlimitedroot soft nofile 100000
root hard nofile 100000
root soft nproc 65535
root hard nproc 65535
root soft memlock unlimited
root hard memlock unlimited
7. Disable Transparent Huge Pages
Redis recommend disable transparent huge pages feature. I will create a service to disable THP.
Create service
vi /etc/systemd/system/disable-thp.service
[Unit]
Description=Disable Transparent Huge Pages (THP)
After=network.target[Service]
Type=oneshot
ExecStart=/bin/bash -c “echo never > /sys/kernel/mm/transparent_hugepage/enabled”
ExecStartPost=/bin/bash -c “echo never > /sys/kernel/mm/transparent_hugepage/defrag”
RemainAfterExit=true[Install]
WantedBy=multi-user.targetActivate disable-thp service
systemctl daemon-reload
systemctl enable disable-thp.service
systemctl start disable-thp.service
Control THP status
You can check THP status with below commands. If you see as [never], THP is disable.
cat /sys/kernel/mm/transparent_hugepage/enabled
cat /sys/kernel/mm/transparent_hugepage/defrag
Second Step : Install Redis Package on Each Node
1. Install Redis
We can install Redis with several different ways. I will use remi repo to installation. Also if you want, you can download Redis last version from redis.io by creating a account.
Linux version is OEL 9.5. so I find suitable redis version as redis-7.2.7-1.el9.remi.x86_64.rpm
cd /tmp/
wget https://rpms.remirepo.net/enterprise/9.5/modular/x86_64/redis-7.2.7-1.el9.remi.x86_64.rpm
rpm -ivh redis-7.2.7-1.el9.remi.x86_64.rpm
2. Create Directories
I will use /data directory for redis data directory.
mkdir -p /data/redis
chown -R redis.redis /data
Third Step : Configure Redis and Sentinel Configuration Files
1. Configure redis.conf
You can find redis configuration file at /etc/redis/redis.conf
I will configure below parameters. Some parameters will be different node by node.
vi /etc/redis/redis.conf
Master Node – 192.168.1.12
bind * -::*
protected-mode no
loglevel verbose
dir /data/redis
masterauth “Password123”
replica-priority 1
aclfile /etc/redis/users.acl
appendonly yesReplica Node 1 – 192.168.1.13
bind * -::*
protected-mode no
loglevel verbose
dir /data/redis
replicaof 192.168.1.12 6379
masterauth “Password123”
replica-priority 2
aclfile /etc/redis/users.acl
appendonly yesReplica Node 2 – 192.168.1.14
bind * -::*
protected-mode no
loglevel verbose
dir /data/redis
replicaof 192.168.1.12 6379
masterauth “Password123”
replica-priority 3
aclfile /etc/redis/users.acl
appendonly yeschown redis.redis redis.conf
2. Configure sentinel.conf
You can find sentinel configuration file at /etc/redis/sentinel.conf
I will remove # for more readable file. Firstly, I will take a backup as sentinel.conf.orginal
cd /etc/redis
cp sentinel.conf sentinel.conf.orginal
grep -Ev ‘^#|^$’ sentinel.conf.orginal > sentinel.conf
vi sentinel.conf
All Nodes
protected-mode no
port 26379
daemonize no
pidfile /var/run/redis-sentinel.pid
loglevel verbose
logfile /var/log/redis/sentinel.log
dir /data/redis
sentinel monitor mymaster 192.168.1.12 6379 2
sentinel down-after-milliseconds mymaster 3000
sentinel parallel-syncs mymaster 1
sentinel failover-timeout mymaster 5000
sentinel auth-pass mymaster “Password123”
sentinel deny-scripts-reconfig yeschown redis.redis sentinel.conf
chmod 640 sentinel.conf
3. Create users.acl
users.acl will provide password authentication for login.
touch /etc/redis/users.acl
chown redis.redis /etc/redis/users.acl
chmod 640 /etc/redis/users.acl
Fourth Step : Start Redis and Sentinel Service
1. Start and Enable Redis Service on All Nodes
systemctl start redis.service
systemctl enable redis.service
2. Start and Enable Sentinel Service on All Nodes
I will create a redis-sentinel.service file because there is not redis-sentinel.service file on my servers.
vi /etc/systemd/system/redis-sentinel.service
[Unit]
Description=Redis Sentinel
After=network.target[Service]
ExecStart=/usr/bin/redis-sentinel /etc/redis/sentinel.conf –supervised systemd
ExecStop=/bin/kill -s TERM $MAINPID
User=redis
Group=redis
Restart=always[Install]
WantedBy=multi-user.target
systemctl daemon-reexec
systemctl daemon-reload
systemctl start redis-sentinel.service
systemctl enable redis-sentinel.service
Fifth Step : Create Users
1. Create Users on All Nodes
[root@rds1 redis]# redis-cli
127.0.0.1:6379> auth default Password123
OK
127.0.0.1:6379> ACL SETUSER default on >Password123 allcommands allkeys allchannels
OK
127.0.0.1:6379> ACL SETUSER user1 on >Password123 allcommands allkeys allchannels
OK
127.0.0.1:6379> ACL SAVE
OK
127.0.0.1:6379> ACL LIST
1) “user default on sanitize-payload #008c70392e3abfbd0fa47bbc2ed96aa99bd49e159727fcba0f2e6abeb3a9d601 ~* &* +@all”
2) “user user1 on sanitize-payload #008c70392e3abfbd0fa47bbc2ed96aa99bd49e159727fcba0f2e6abeb3a9d601 ~* &* +@all”Also, you can see users at /etc/redis/users.acl file.
Sixth Step : Cluster Status Check
1. Check sentinel.conf
Master Node
more /etc/redis/sentinel.conf
protected-mode no
port 26379
daemonize no
pidfile “/var/run/redis-sentinel.pid”
loglevel verbose
logfile “/var/log/redis/sentinel.log”
dir “/data/redis”
sentinel monitor mymaster 192.168.1.12 6379 2
sentinel down-after-milliseconds mymaster 3000sentinel failover-timeout mymaster 5000
sentinel auth-pass mymaster Password123
sentinel deny-scripts-reconfig yes# Generated by CONFIG REWRITE
latency-tracking-info-percentiles 50 99 99.9
supervised systemd
user default on nopass sanitize-payload ~* &* +@all
sentinel myid f03686f91106b6173c30cdcc517527df5fa38943
sentinel config-epoch mymaster 0
sentinel leader-epoch mymaster 0
sentinel current-epoch 0sentinel known-sentinel mymaster 192.168.1.13 26379 ab94b82a7bc368de19aafb63513ccb2380d243b4
sentinel known-sentinel mymaster 192.168.1.14 26379 23a2bfdc79fa7d96a3e830e89ef3b24290b2fefa
sentinel known-replica mymaster 192.168.1.13 6379
sentinel known-replica mymaster 192.168.1.14 6379
Replica Node 1
protected-mode no
port 26379
daemonize no
pidfile “/var/run/redis-sentinel.pid”
loglevel verbose
logfile “/var/log/redis/sentinel.log”
dir “/data/redis”
sentinel monitor mymaster 192.168.1.12 6379 2
sentinel down-after-milliseconds mymaster 3000sentinel failover-timeout mymaster 5000
sentinel auth-pass mymaster Password123
sentinel deny-scripts-reconfig yes# Generated by CONFIG REWRITE
supervised systemd
latency-tracking-info-percentiles 50 99 99.9
user default on nopass sanitize-payload ~* &* +@all
sentinel myid ab94b82a7bc368de19aafb63513ccb2380d243b4
sentinel config-epoch mymaster 0
sentinel leader-epoch mymaster 0
sentinel current-epoch 0sentinel known-replica mymaster 192.168.1.14 6379
sentinel known-sentinel mymaster 192.168.1.12 26379 f03686f91106b6173c30cdcc517527df5fa38943
sentinel known-sentinel mymaster 192.168.1.14 26379 23a2bfdc79fa7d96a3e830e89ef3b24290b2fefa
sentinel known-replica mymaster 192.168.1.13 6379
Replica Node 2
protected-mode no
port 26379
daemonize no
pidfile “/var/run/redis-sentinel.pid”
loglevel verbose
logfile “/var/log/redis/sentinel.log”
dir “/data/redis”
sentinel monitor mymaster 192.168.1.12 6379 2
sentinel down-after-milliseconds mymaster 3000sentinel failover-timeout mymaster 5000
sentinel auth-pass mymaster Password123
sentinel deny-scripts-reconfig yes# Generated by CONFIG REWRITE
supervised systemd
latency-tracking-info-percentiles 50 99 99.9
user default on nopass sanitize-payload ~* &* +@all
sentinel myid 23a2bfdc79fa7d96a3e830e89ef3b24290b2fefa
sentinel config-epoch mymaster 0
sentinel leader-epoch mymaster 0
sentinel current-epoch 0sentinel known-sentinel mymaster 192.168.1.13 26379 ab94b82a7bc368de19aafb63513ccb2380d243b4
sentinel known-replica mymaster 192.168.1.14 6379
sentinel known-sentinel mymaster 192.168.1.12 26379 f03686f91106b6173c30cdcc517527df5fa38943
sentinel known-replica mymaster 192.168.1.13 6379
2. Check Replication
Master Node
[root@rds1 redis]# redis-cli
127.0.0.1:6379> auth default Password123
OK
127.0.0.1:6379> info replication
# Replication
role:master
connected_slaves:2
slave0:ip=192.168.1.14,port=6379,state=online,offset=325224,lag=1
slave1:ip=192.168.1.13,port=6379,state=online,offset=325224,lag=1
master_failover_state:no-failover
master_replid:a0185047c72a48c65d3ff584865dc3675b1d03af
master_replid2:0000000000000000000000000000000000000000
master_repl_offset:325502
second_repl_offset:-1
repl_backlog_active:1
repl_backlog_size:1048576
repl_backlog_first_byte_offset:1
repl_backlog_histlen:325502Replica Node 1
[root@rds2 redis]# redis-cli
127.0.0.1:6379> auth default Password123
OK
127.0.0.1:6379> info replication
# Replication
role:slave
master_host:192.168.1.12
master_port:6379
master_link_status:up
master_last_io_seconds_ago:1
master_sync_in_progress:0
slave_read_repl_offset:361185
slave_repl_offset:361185
slave_priority:2
slave_read_only:1
replica_announced:1
connected_slaves:0
master_failover_state:no-failover
master_replid:a0185047c72a48c65d3ff584865dc3675b1d03af
master_replid2:0000000000000000000000000000000000000000
master_repl_offset:361185
second_repl_offset:-1
repl_backlog_active:1
repl_backlog_size:1048576
repl_backlog_first_byte_offset:9337
repl_backlog_histlen:351849Replica Node 2
[root@rds3 redis]# redis-cli
127.0.0.1:6379> auth default Password123
OK
127.0.0.1:6379> info replication
# Replication
role:slave
master_host:192.168.1.12
master_port:6379
master_link_status:up
master_last_io_seconds_ago:1
master_sync_in_progress:0
slave_read_repl_offset:371263
slave_repl_offset:371263
slave_priority:3
slave_read_only:1
replica_announced:1
connected_slaves:0
master_failover_state:no-failover
master_replid:a0185047c72a48c65d3ff584865dc3675b1d03af
master_replid2:0000000000000000000000000000000000000000
master_repl_offset:371263
second_repl_offset:-1
repl_backlog_active:1
repl_backlog_size:1048576
repl_backlog_first_byte_offset:9337
repl_backlog_histlen:361927
3. Check Sentinel
[root@rds1 redis]# redis-cli -p 26379
127.0.0.1:26379> auth default Password123
OK
127.0.0.1:26379> sentinel masters
1) 1) “name”
2) “mymaster”
3) “ip”
4) “192.168.1.12”
5) “port”
6) “6379”
7) “runid”
8) “fd52c7129201e03249df7b579b5ac75b8d1b5886”
9) “flags”
10) “master”
11) “link-pending-commands”
12) “0”
13) “link-refcount”
14) “1”
15) “last-ping-sent”
16) “0”
17) “last-ok-ping-reply”
18) “118”
19) “last-ping-reply”
20) “118”
21) “down-after-milliseconds”
22) “3000”
23) “info-refresh”
24) “6876”
25) “role-reported”
26) “master”
27) “role-reported-time”
28) “2326059”
29) “config-epoch”
30) “0”
31) “num-slaves”
32) “2”
33) “num-other-sentinels”
34) “2”
35) “quorum”
36) “2”
37) “failover-timeout”
38) “5000”
39) “parallel-syncs”
40) “1”127.0.0.1:26379> SENTINEL get-master-addr-by-name mymaster
1) “192.168.1.12”
2) “6379”127.0.0.1:26379> SENTINEL slaves mymaster
1) 1) “name”
2) “192.168.1.14:6379”
3) “ip”
4) “192.168.1.14”
5) “port”
6) “6379”
7) “runid”
8) “19083afb2af517c11dd12d52366f52b605f11898”
9) “flags”
10) “slave”
11) “link-pending-commands”
12) “0”
13) “link-refcount”
14) “1”
15) “last-ping-sent”
16) “0”
17) “last-ok-ping-reply”
18) “130”
19) “last-ping-reply”
20) “130”
21) “down-after-milliseconds”
22) “3000”
23) “info-refresh”
24) “5673”
25) “role-reported”
26) “slave”
27) “role-reported-time”
28) “2465451”
29) “master-link-down-time”
30) “0”
31) “master-link-status”
32) “ok”
33) “master-host”
34) “192.168.1.12”
35) “master-port”
36) “6379”
37) “slave-priority”
38) “3”
39) “slave-repl-offset”
40) “526637”
41) “replica-announced”
42) “1”
2) 1) “name”
2) “192.168.1.13:6379”
3) “ip”
4) “192.168.1.13”
5) “port”
6) “6379”
7) “runid”
8) “a3304c327c08fc35b58b45820fde6c86dc3eb396”
9) “flags”
10) “slave”
11) “link-pending-commands”
12) “0”
13) “link-refcount”
14) “1”
15) “last-ping-sent”
16) “0”
17) “last-ok-ping-reply”
18) “130”
19) “last-ping-reply”
20) “130”
21) “down-after-milliseconds”
22) “3000”
23) “info-refresh”
24) “5673”
25) “role-reported”
26) “slave”
27) “role-reported-time”
28) “2465451”
29) “master-link-down-time”
30) “0”
31) “master-link-status”
32) “ok”
33) “master-host”
34) “192.168.1.12”
35) “master-port”
36) “6379”
37) “slave-priority”
38) “2”
39) “slave-repl-offset”
40) “526637”
41) “replica-announced”
42) “1”
4. Check Log Files
tail -100f /var/log/redis/redis.log
tail -100f /var/log/redis/sentinel.log
tail -100f /var/log/messages
5. Check Latency
[root@rds1 redis]# redis-cli –latency
min: 0, max: 1, avg: 0.02 (176 samples)
Seventh Step : Keepalived Virtual IP Configuration
We will use a virtual IP which is 192.168.1.11 for connecting to redis from applications. So, I configure keepalived service on all nodes regarding to redis.
1.Keepalived Package Install
dnf install keepalived
2.Create redis master check bash script
cd /etc/keepalived
vi check_redis_master.sh
#!/bin/bash
ROLE=$(redis-cli -a Password123 INFO replication 2>/dev/null | grep -v “Warning” | grep role | cut -d’:’ -f2 | tr -d ‘\r’)
if [ “$ROLE” == “master” ]; then
exit 0
else
exit 1
fichmod +x check_redis_master.sh
3.Configure keepalived.conf
vi keepalived.conf
vrrp_script chk_redis {
script “/etc/keepalived/check_redis_master.sh”
interval 2
weight 10
}vrrp_instance VI_1 {
state MASTER
interface ens160
virtual_router_id 51
priority 100
advert_int 1
authentication {
auth_type PASS
auth_pass Pass1234
}
virtual_ipaddress {
192.168.1.11
}
track_script {
chk_redis
}
}First node keepalived.conf will be like above. Second node keepalived.conf some parameters will change like that state BACKUP and priority 90. Third node keepalived.conf some parameters will change like that state BACKUP and priority 80.
4. Start Keepalived Service
systemctl start keepalived.service
systemctl enable keepalived.service
5. Check IP
You can check IP with ip a command
Eighth Step : Failover Operations
Redis Sentinel manages failover operations and chooses new master from candidates. Redis Sentinel make failover automatically when reboot or interruption on master node. Also you can make failover manually with below commands.
1.Check Status Before Failover
[root@rds1 redis]# redis-cli
127.0.0.1:6379> auth default Password123
OK
127.0.0.1:6379> info replication
# Replication
role:master
connected_slaves:2
slave0:ip=192.168.1.14,port=6379,state=online,offset=754198,lag=0
slave1:ip=192.168.1.13,port=6379,state=online,offset=754198,lag=0
master_failover_state:no-failover
master_replid:03026581141f83e6224b3ad1a15b982b8b5854dc
master_replid2:e6be901b80683835a598cee49dfed0b412d62ed7
master_repl_offset:754198
second_repl_offset:739868
repl_backlog_active:1
repl_backlog_size:1048576
repl_backlog_first_byte_offset:653194
repl_backlog_histlen:101005connected_slaves count has to be suitable.
lag has to be 0 or max 1.
offset has to be the same or near.
state has to be online.
2.Failover
[root@rds1 redis]# redis-cli -p 26379 SENTINEL failover mymaster
OK
[root@rds1 redis]# redis-cli -p 26379 SENTINEL get-master-addr-by-name mymaster
1) “192.168.1.13”
2) “6379”As you see second node is new master now.
Bonus : Useful Commands
1.DML
SET key value Sets a key to hold the specified value
GET key Gets the value of a key
DEL key Deletes a key
EXISTS key Checks if a key exists (returns 1 or 0)
EXPIRE key seconds Sets a time-to-live (TTL) for a key
TTL key Gets remaining TTL for a key
INCR key Increments the integer value of a key by one
DECR key Decrements the integer value of a key by one
APPEND key value Appends value to an existing key
2.List
LPUSH key value Inserts value at the head of the list
RPUSH key value Inserts value at the end of the list
LPOP key Removes and returns the first element
RPOP key Removes and returns the last element
LRANGE key 0 -1 Returns elements between given indexes
3.Set
SADD key value Adds a value to a set
SREM key value Removes a value from a set
SMEMBERS key Gets all members of the set
SISMEMBER key value Checks if a value exists in the set
4.Hash
HSET key field value Sets a field in a hash
HGET key field Gets the value of a field in a hash
HDEL key field Deletes a field from a hash
HGETALL key Gets all fields and values in a hash
5.DDL
KEYS * Lists all keys (not recommended for production)
FLUSHDB Deletes all keys in the current DB
FLUSHALL Deletes all keys in all databases
RENAME old new Renames a key
TYPE key Returns the data type of the key
6.Config
SAVE Performs a synchronous save to disk
BGSAVE Performs an asynchronous background save
LASTSAVE Shows the last successful save time
CONFIG GET <pattern> Gets configuration parameters
CONFIG SET <param> <value> Dynamically sets a configuration value
7.Control & Monitor
INFO replication Shows replication role and status
INFO persistence Shows persistence status
SLAVEOF host port Makes the server a replica of another instance
SENTINEL get-master-addr-by-name name Returns IP/Port of monitored master
MONITOR Streams all received commands in real-time
SLOWLOG get Shows list of slow commands
INFO Displays detailed information about Redis server