Logical Volume Manager is a disk partitioning solution on linux systems. This architecture provides advantages. You can extend disk size easily with lvm without losing exist data. But, If you use fdisk that is classical method for partition, you can not resize this partitions without losing data.
You can follow below steps to configure lvm.
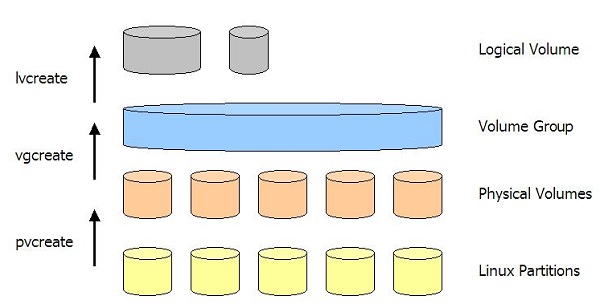
LVM Creation Steps
1- Disk partition “cfdisk”
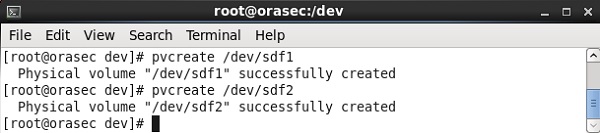
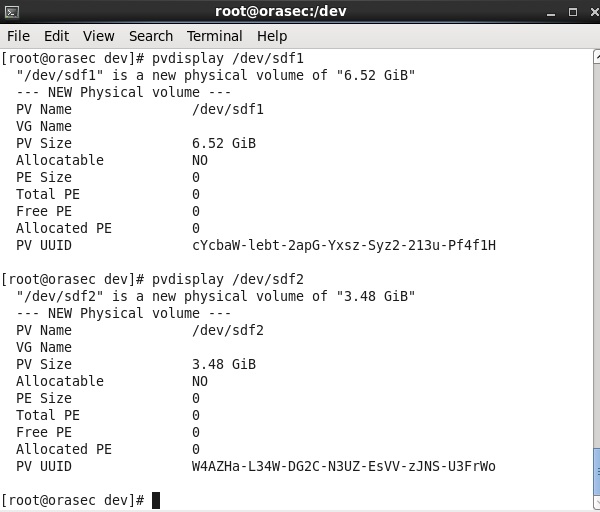
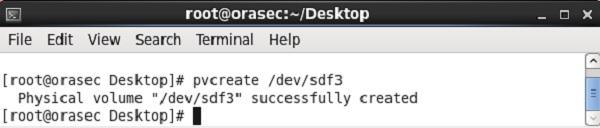
2- Create physical volume “pvcreate”
3- Create virtual group “vgcreate”
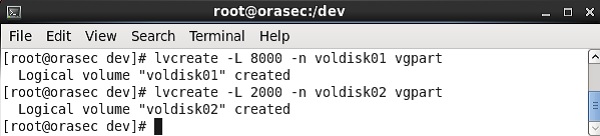
4- Create logical volume “lvcreate”
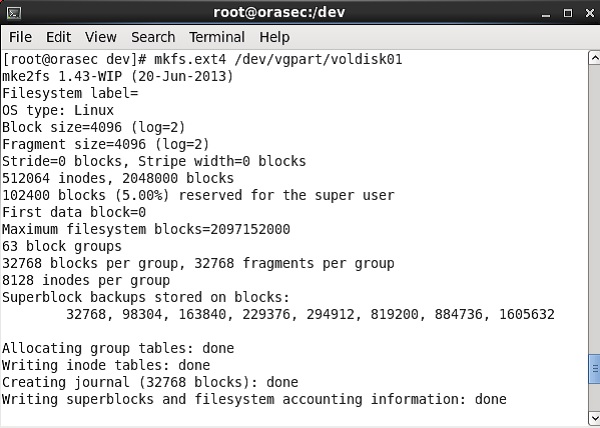
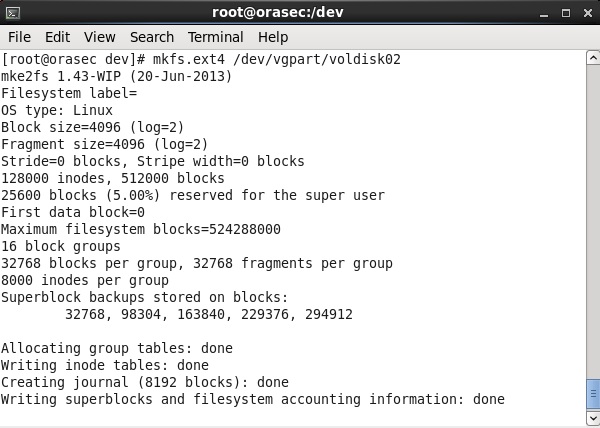
5- Format logical volume “mkfs.ext4”
6- Add Fstab “vi /etc/fstab”
LVM Architecture
Logical Volume Manager Architecture
Configure LVM Disks
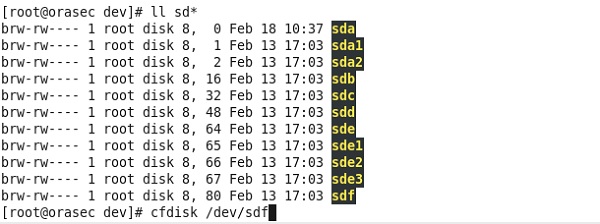
We will configure sdf disk that is new disk.
[root ~]# ll /dev/sd* Create Partitions
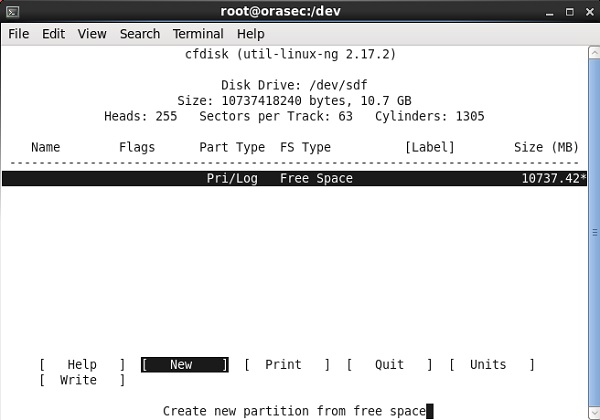
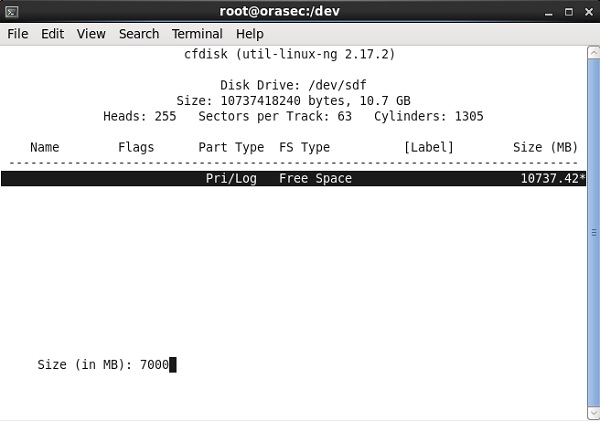
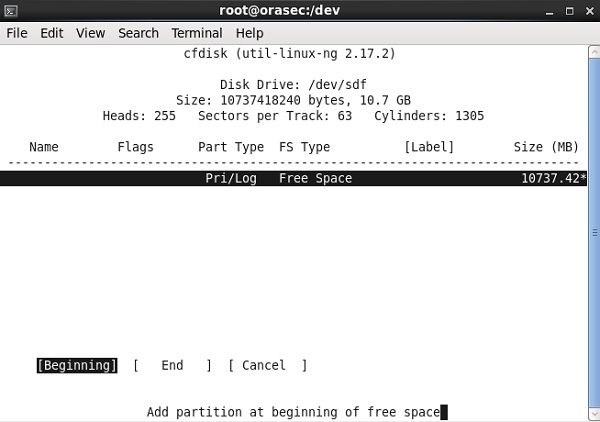
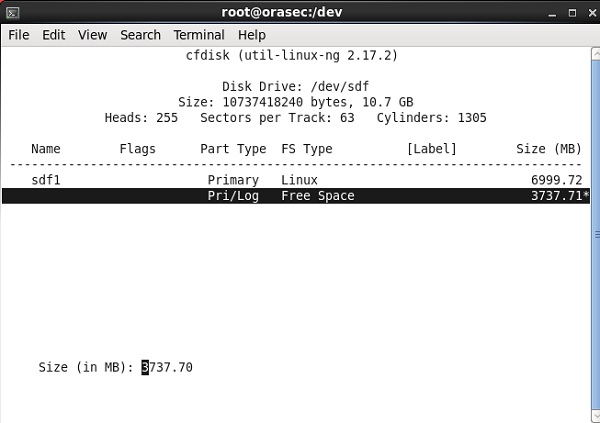
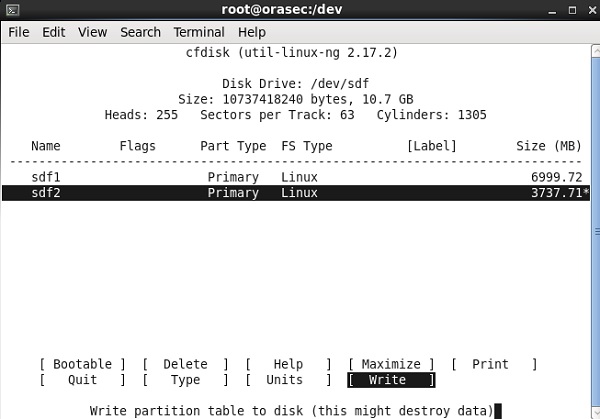
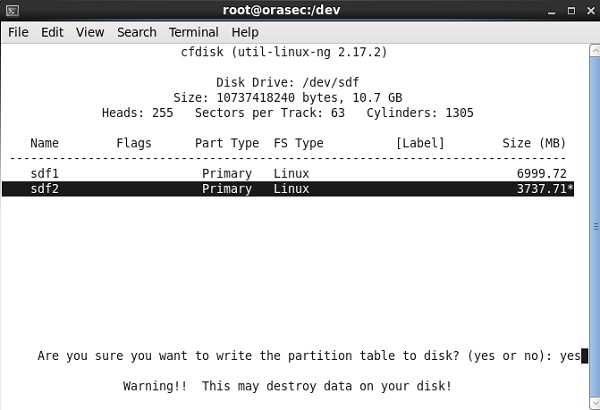
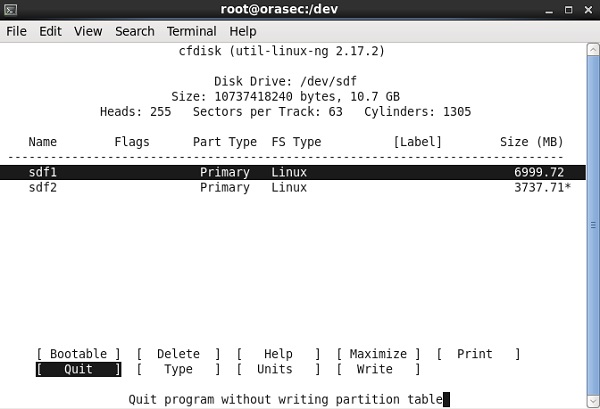
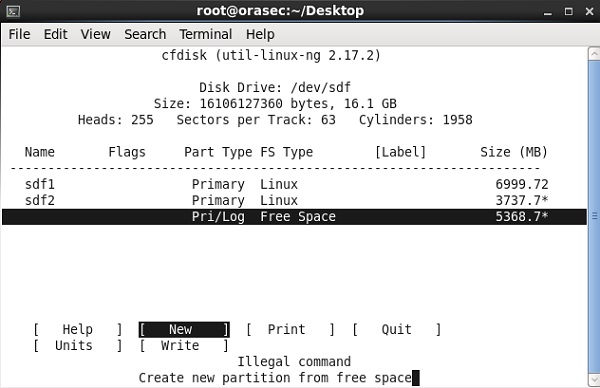
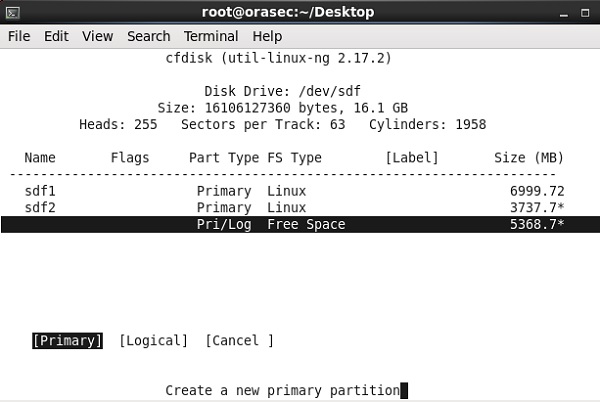
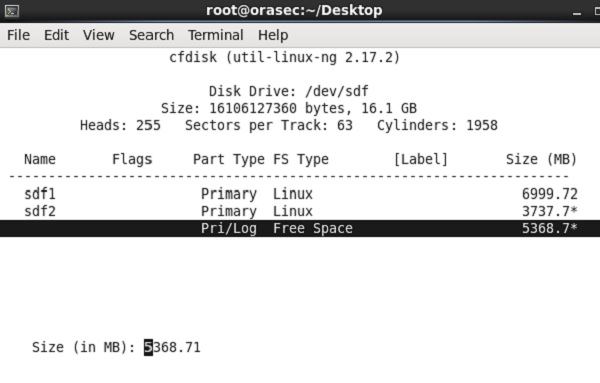
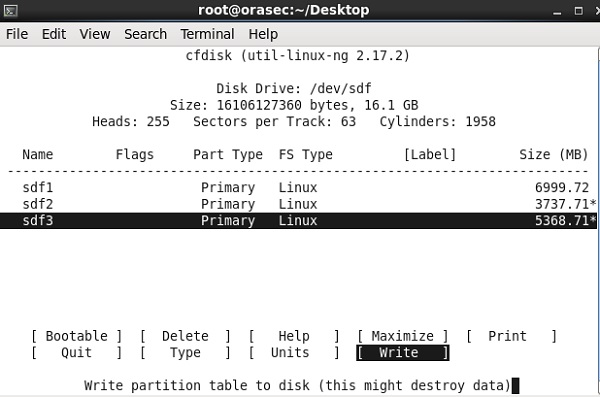
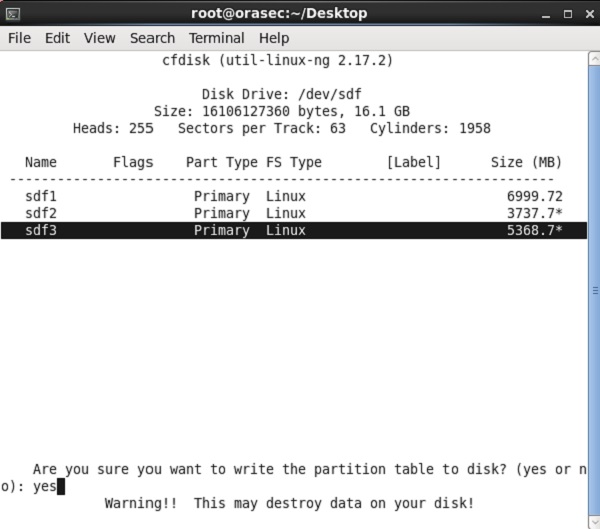
[root ~]# cfdisk /dev/sdf
List Partitions
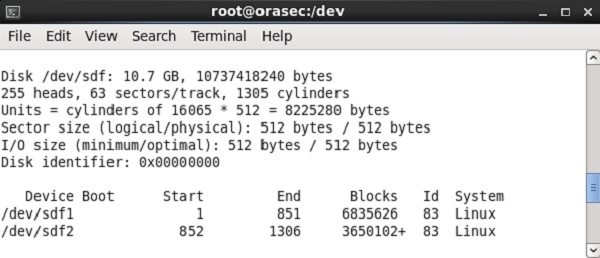
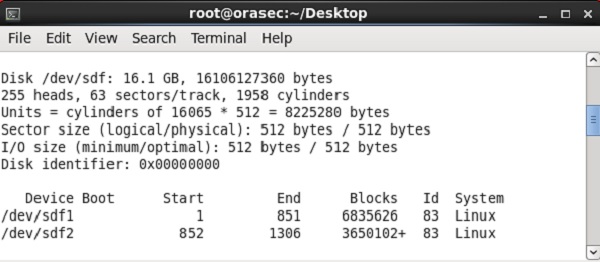
[root ~]# fdisk -l Create Physical Volumes
Create Virtual Group Create Logical Volumes
If you want to give %100 area to logical vol, you can use “lvcreate -n voldisk01 -l 100%FREE vgpart”
Format Logical Volumes
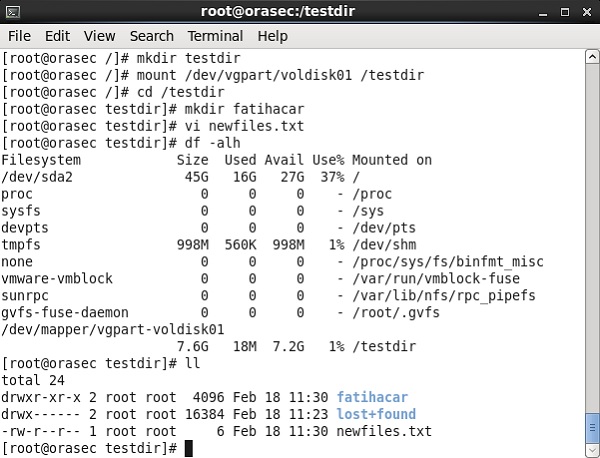
Create Directory, Mount Logical Disk, Add Test Values Logical Volume Add to Fstab
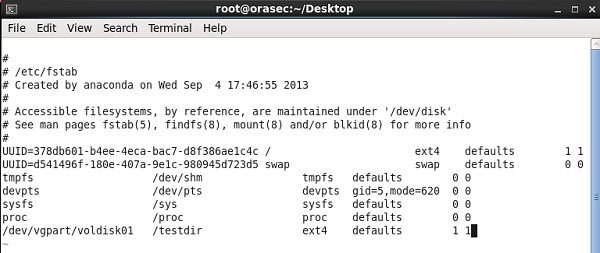
[root ~]# vi /etc/fstab
Extend LVM Disk
Display sdf Disk After Extend Disk Size As Physical
[root ~]# fdisk -l Create Partitions
[root ~]# cfdisk /dev/sdf
Create Physical Volumes
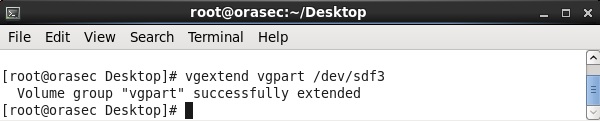
If you get an error that do not recognize new disk, you can reboot system to resolve. Extend Virtual Group
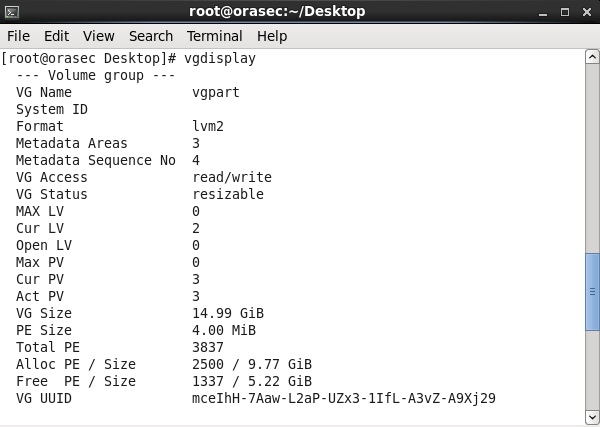
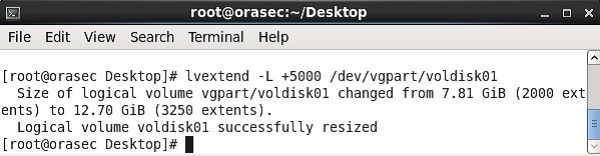
Extend Logical Volume
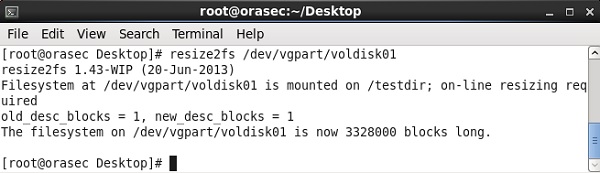
If you want to use all free space to extend, you can use lvextend -l +100%FREE /dev/vgpart/voldisk01 Resize Logical Volume
If resize2fs do not work, you can use xfs_growfs /dev/vgpart/voldisk01 command to resize logical volume. Display New Disk Size and Test Values


 Follow